Whether it’s because more time at home has given them a chance to do some storage spring cleaning or they’re in search of a new outdoor hobby, people all over the world are looking at the mountain bikes sitting in the back of their garage with renewed interest.
If that sounds like you, then you’ve probably already wondered how to know whether your mountain bike is safe to ride after months or even years of being in storage. The ASO Mammoth team has you covered thanks to our list of what to look for when taking your mountain bike out of storage below. Check out the list and stop by the ASO shop the next time you’re in Mammoth Lakes for the best outdoor gear and rentals in town!
Your Tires Tire Out Even in Storage
The first thing most people will check when they take their mountain bike out of storage is the tires, and you should too. Not only are tires a vital part of every ride, but they also degrade faster than just about any other part of your bike. Basic elements like ozone and sunlight can cause your tires to crack while in storage, but even simply not using your tires for an extended period of time can cause them to wear out. For example, bike tires can simply breakdown due to dry rot which you may not be able to notice until the tires are properly inflated and ridden.
For that reason, it’s important that you inflate your tires and inspect them closely for any signs of cracking, bulging, or leaks before you take them out on the road. After you’ve inflated the tires, ride around somewhere safe to make sure there is no cracking once the tires are on the ground and have weight on them.
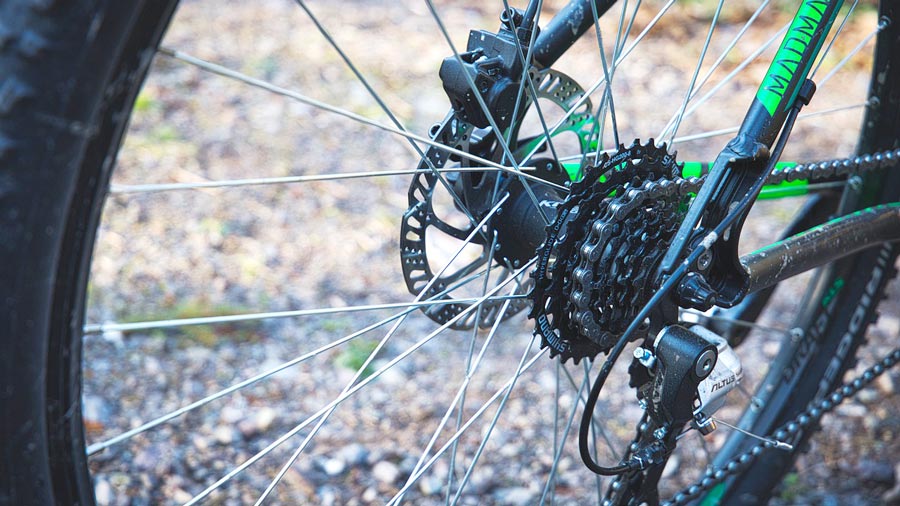
Test Out Your Brakes Before the Trail
There’s nothing scarier than your brakes malfunctioning. Fortunately, you can avoid a brake failure by testing them as soon as you take your mountain bike out of storage.
The first thing you’ll want to check for is squealing or any type of obstruction that causes a bumpy deceleration, but there is more to your brakes than just that. Don’t forget to check the brake lever itself to make sure that no corrosion or obstructions are stopping it from braking and returning to its disengaged position. Work your way down from the brake lever to the brake cable and check for any kinks or fraying. Once you’re confident that the brake lever and cable are in shape you can turn your focus to the actual brakes. If you have disc brakes, then you’ll want to check the brake pad thickness and the wear on the rotors. If you need help deciding whether your brakes are in good shape, then there are plenty of images of healthy brake pads and rotors online to compare yours to.
Check Your Chain for Corrosion, Tension, and Lubrication
You want your chain to be well-lubricated and properly engaged before you hit the trail, so make sure your chain is under proper tension and performing well when you take your mountain bike out of the garage. You should also examine your bike chain closely for any signs of corrosion like rust before your first ride.
Check for Corrosion or Cracks Over the Entire Bike
Although cracks in the frame of a mountain bike are rare, they can cause serious accidents. For that reason, you need to look over your entire bike for cracks when taking it out of storage. Plus, other parts of your bike like the spokes can corrode if stored near certain chemicals, so give your entire bike a good look-over before you take it out for a ride!